 Making Great Hunt Videos
Cleanthe lens often. Shooting through a dirty lens is a common amateur mistake.
Learn how to operate video equipment before shooting a hunt.
Smooth operation results in smooth video.
Practice at home and in the bush.
Shoot in different situations, from different angles and with different lighting.
Determine what produces desirable images and what doesn’t
Tell the whole story. Include the hunter and his emotions before, during and after the hunt.
Cover camp life, the conversations over coffee or dinner.
Incorporate hunting partners, the terrain traveled and every bit of nature.
Interview the people – everyone at camp has a great story's to tell that is worth reliving.
Set up with the sun at, behind or off to the side of the camera. Otherwise, use the polarising lens filter.
Set up to the right and slightly behind the hunter, because the viewfinder is positioned on the left side of most cameras, swinging to the left from this position is easy.
Sit close to the hunter to facilitate conversation.
Position a microphone on the hunter so binoculars or game calls hanging around the neck won’t bump it.
Do not put it underneath clothing – fabric rub against the mic destroys the sound track.
Resist the urge to tell the hunter to shoot. The view through the camera lens isn’t what the hunter sees.
Abstain from zooming in too tight on an animal. Tight zoom makes following the animal difficult and greatly amplifies camera shake.
Resist over thinking camera movement. Learn when to move and when not to move.
Take advantage of landscape features that hide camera movement.
Shoot lots of footage. Mossy Oak shoots about 360 minutes to get 1 30-minute show.
You can never have too much film, but too little is always a disappointment.
Taking the time necessary to get great video footage will mean the difference between friends snoozing during the video showing or sitting at the edge of theirseats.
 Get a good tripod and use it – the first step in improving your videos is stabilising them. Your camcorder may have built in image stabilisation but it can only compensate for so much motion.
 One of the best ways to improve the appearance -of your videos is to get a quality tripod. While some camcorders come with tripods, very cheap or give-away tripods tend not to provide a very good shooting base. $100-200 is the starting range for tripods that will be sturdy and offer smooth movements. Be sure to get a tripod with a head specifically designed for video.
Learn when to pan, zoom and use other moves – One of the most common video mistakes is making constant movements and adjustments. Be deliberate when making adjustments, don’t make changes without a reason. Take a shot of something and leave it there for 10-20 seconds, stop the recording and take another shot. Don’t quickly pan the camera from one subject to another. When panning and zooming use slow smooth and deliberate motions. This will make your videos much more watchable.
Do a little shot composition – the purpose of taping something is so you will be able to remember and enjoy it later. Before you hit the red button, look at your shot and see if you have everything in it that you want and that it is framed nicely. Do this as you would if you were taking a still picture; prior to pressing record not after. Good shot composition uses the “Rule of Thirds” This is where you treat the screen as being divided into a tic-tac-toe pattern (see fig 1). When framing a person, you want their eyes on the top line and the centre of their head on the lead or the right line (facing inward). Although this may cut off the top of the subjects head, it will provide the proper balance and really make your shot look professional.
Learn your camcorder - like the back of your hand – the best videographers know every function of their camcorder and could operate it with their eyes shut. Having goof knowledge of your camcorders features and functions is a necessary element of making better videos. The most obvious need for this knowledge is to allow you to always have your eye in the viewfinder or on the LCD screen, not looking away at the controls to zoom, focus or make other corrections. More than just knowing where each control is, you should learn how all the image settings like white balance, exposure and back-light affect the image.
Tell a story – if you don’t have the time to formally edit your videos, use in camera editing (ie the fancy name for pressing record and pause at just the right times) to neatly follow some chronological path and tell a story. People will more likely feel compelled to watch your videos if they tell a story. It matters less what the story is about than how well it is told. You don’t have to narrate your videos to tell a story; the pictures can do that. Take a wedding for example. First we get a shot of the outside of the church. Then get some good interior shots of the church to show what it looks like. During the ceremony, get shots of the bride and groom as well as family members’ reactions. You’ve now told a story about a wedding that will be interesting to watch.
Put a tiny amount of money into a Lavaliere Microphone – the best audio purchase that you can make if you’re mostly doing home videos is a lavaliere (lav) microphone (see fig 3) It’s designed to clip onto the clothing of the subject (e.g., lapel, tie or collar) near their mouth and plug into the camcorder to pick up the best possible speech audio. Lavs are also small enough that you can hide somewhere in a scene to pick up better sound than a camera mounted mic. If you really don’t think you would put a lav to any use, consider some other external mic, such as a shotgun or handheld. This reason for doing this is simple; your on-camera microphone cannot be placed anywhere closer to the audio source that where the camera is. Even the best on camera microphones will not do an adequate job of picking up soft sounds at a distance. Additionally the unwanted sounds between you and your subject will be picked up and with many on camera mics this can include sounds to the side and behind the camera as well. External mics start at around $30. It is great to have one in your bag if the situation that calls for a mic comes up.
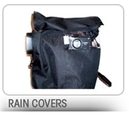
Look into lighting – a lot of image quality problems can be solved by employing some simple lighting techniques. You may not want to invest in or have the desire to carry an entire lighting kit with you wherever you go, but you can make the best of the natural or available lighting situations that you face. Whenever possible, shoot in a well-lit area. Make sure there is not bright light like the sun behind the subject. If you subject is standing in a bad lighting situation, have them move into better light if possible and the video will look much better.
Interviews – A great way to improve your videos is to interview subjects. Interviews can provide good insights through the actual words of people involved. No matter what the event is, a baseball game, picnic, wedding or party, interviews can add a nice touch. When doing an interview, frame the shot with the head and upper chest showing and the subject off centre to one side or the other. As the interviewer you do not need to be in the shot, but rather stand next to the camera. Stand on the side of the camera that will be the open side of the shot, and have the interviewee face you. Tell the interviewee NOT to look at the camera, but just carry on a normal conversation with you and keep eye contact. This may seem awkward but it works really well and it is how almost all professional interviews are done (see fig 4). Remember to leave plenty of space in the shot to allow for the interviewee to move naturally and nod. This way they won’t slip out of shot.
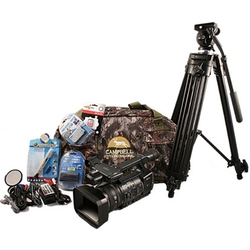
Pack Well – every videographer has their favorite video goodies that they keep in their bag, but there are some basic things that every camcorder owner should carry with them. One thing is a special lens cleaning cloth that does not scratch the lens. Commonly used for glasses these cloths are great for wiping down the camera lens or LCD screen. Another is an extra battery (invest in an extra long life battery so your ‘never’ run out!). A pen, notepad and extra labels are also essentials. Bring along as much extra videotape as you can comfortably carry. It is also good to carry a set of video cables because you never know when you’ll need them. A roll of tape to secure cords or other things is a good to have a long with you as well as anything else that you think will make shooting videos easier.
Have Fun! – the key to making good videos is enjoying yourself. Always find new and interesting things to do and to shoot to make your camera experiences fun and exciting. Experiment with your camera and see what you enjoy and what works well for you. Remember that if you’re having fun, so will your viewers.


Camera Tips & Tricks

Sony Centre offers you a complete Sony experience.
Our Sony Centre stores offer the whole Sony range in an interactive and entertaining environment with a team who understand and appreciate every feature and benefit of each Sony product.
SonyCentral is Your Sony Only StoreFeel inspired and entertained by the complete Sony range. Whether you are interested in the latest Full High Definition BRAVIA LCD TV, a Cyber-shot digital camera with smile shutter technology, or VAIO Notebook for business on the move, you'll find all this and much more at Sony Centre.
Experience the very best that Sony has to offer in one of our ten Sony Centre locations across Australia.
Sony Centre Store Locations


Video Tips & Tricks For Quality Hunting Movies